编写嵌入式程序时往往需要制作字库,但网上的工具往往有各种各样不完美的地方,比如不能自定义索引,不能使用自定义的字体,不能指定字模的特殊长宽(比如10*10、13*17等),要不然就是需要开通VIP。
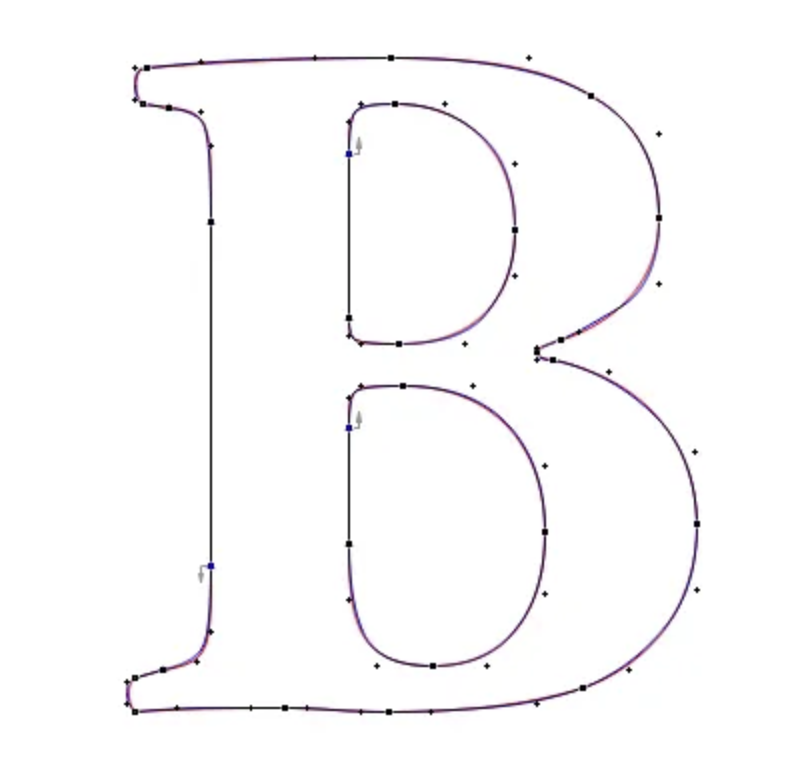
但其实通过Python可以方便的制作字库,完全免费并且可以自定义数据组织方式。其原理是,通过PIL库,将ttf字体渲染到指定大小的画布上,再读取画布上像素生成数据。ttf是TrueType字体文件的缩写,它是微软和苹果在上世纪研发的字体技术。通过使用贝塞尔曲线等方法来绘制字体轮廓,ttf能够在占用较少存储空间的限制下,仍然能够展现出最佳的视觉效果。这意味着即使在不同分辨率的设备上,字体仍然能够保持锐利和清晰。相关资料:
字模制作
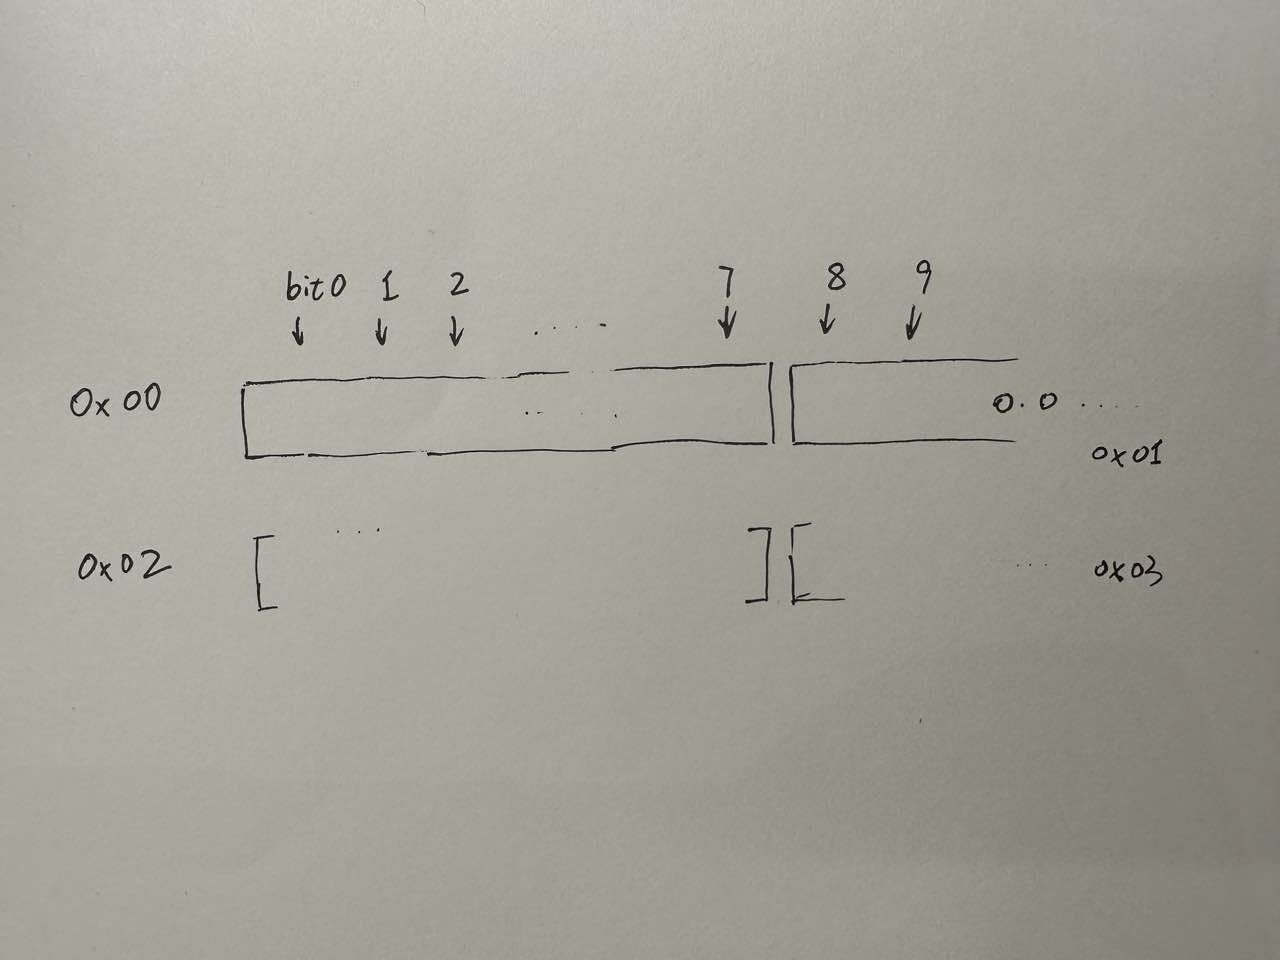
取字模有几种规则,可以按列取或按行取,“Z”字型取或“И”字型取等。由于我需要的是10*10的字模,这里选择按行、每行使用两个字节即uint16_t来存储像素,低位在左的方式。代码如下:
def extract_any_font(character: str) -> bytearray:
    # 加载字体文件
    font = ImageFont.truetype("Zfull-GB.TTF", 10)

    # 绘制字体,即参数`character`
    img = Image.new("RGB", (10, 10), 0)
    draw = ImageDraw.Draw(img)
    draw.text(xy=(0, 0), text=character, fill=0xFFFFFF, font=font, spacing=4, align="left")

    # 读取像素。需要调整取字模顺序时,修改此处
    pixels = bytearray(20)
    for y in range(10):
        this_line = 0
        for x in range(10):
            r, _, _ = img.getpixel(xy=(x, y))
            if r > 0:
                this_line |= (1 << x)
        pixels[2 * y] = 0xFF & this_line
        pixels[2 * y + 1] = 0xFF & (this_line >> 8)

    print(", ".join([f"0x{var:02X}" for var in pixels]))
    return pixels


def render(data: bytearray):
    """ 将字体渲染到控制台上 """
    for y in range(10):
        this_line = []
        for x in range(8):
            this_line.append("X" if data[y * 2] & (1 << x) else " ")
        for i in range(2):
            this_line.append("X" if data[y * 2 + 1] & (1 << i) else " ")
        print(" ".join(this_line))


render(extract_any_font("汉"))
输出:
0x00, 0x00, 0x01, 0x00, 0xFA, 0x00, 0x91, 0x00, 0x92, 0x00, 0x90, 0x00, 0x62, 0x00, 0x62, 0x00, 0x91, 0x00, 0x0D, 0x01

X
  X   X X X X X
X       X     X
  X     X     X
        X     X
  X       X X
  X       X X
X       X     X
X   X X         X

Process finished with exit code 0
字体索引设计
考虑到日常中绝大多数场景使用的Unicode编码都不超过65535,这也是很多ttf文件所包含的字符范围。因此,一个字体文件包含这65535个字符已经足够。对于上述提到的10*10点阵字体,每个字符占用20字节。如果以Unicode编码的序号作为索引,采用扁平结构存储,那么65535个字符将需要占用65535*20 /1024 /1024≈1.25MB的存储空间。对于单片机的程序来说,这显然有些奢侈。
如果我们需要使用全部字符,那么上述方案已经是最优解,没有任何空间浪费。然而,如果我们只需要使用几千或两三万个字符,那么就有很大的优化空间。最明显的问题是,在仅存储部分字符的情况下,采用扁平结构存储会导致即使缺失的字符也需要填充20个字节的空间,这非常浪费。
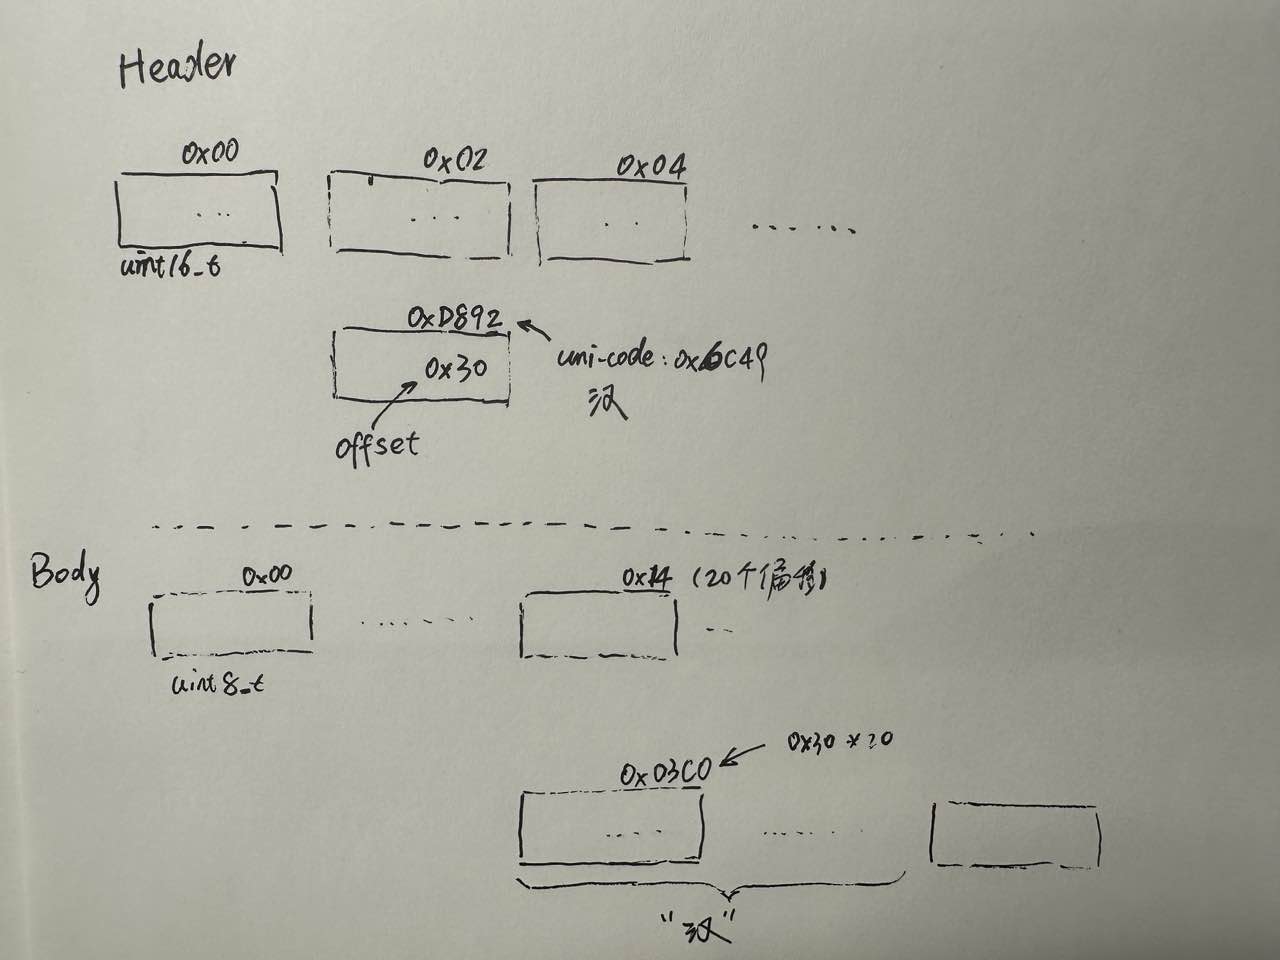
为了优化存储空间,一个简单的解决方案是将字体文件分为两个部分。后半部分称为"body",用于存储每个字模的具体像素,每组占用20个字节。前半部分称为"header",以Unicode编号作为索引,其值表示该字符在"body"中的偏移量。由于我们最多处理65535个字符,使用两个字节就足够了。
假设我们只需要存储常用的2万个汉字,那么存储空间可以压缩到约506KB,计算方式为(65535*2 + 20000*20) / 1024 / 1024 ≈ 506 KB。
结构如图:
完整生成字库代码:
def gen_character_library(ttf_file: str, target: str):
    font = ImageFont.truetype(ttf_file, 10)
    header = BytesIO()
    body = BytesIO()
    null_char = None
    body_offset = 0

    for i in range(0, 0xFFFF + 1):
        # render single word
        img = Image.new("RGB", (10, 10), 0)
        draw = ImageDraw.Draw(img)
        text = chr(i)
        draw.text(xy=(0, 0), text=text, fill=0xFFFFFF, font=font, spacing=4, align="left")

        # 读取像素。需要调整取字模顺序时,修改此处
        pixels = bytearray(20)
        for y in range(10):
            this_line = 0
            for x in range(10):
                r, _, _ = img.getpixel(xy=(x, y))
                if r > 0:
                    this_line |= (1 << x)
            pixels[2 * y] = 0xFF & this_line
            pixels[2 * y + 1] = 0xFF & (this_line >> 7)

        # 特殊处理。0号字符必然是不可见字符,只有第一次循环会执行到这里,即null_char其实是0号字符的字模
        if null_char is None:
            null_char = pixels

        if pixels == null_char and i > 0:
            # 之后直接引用0位置, 只写 header, 不写 body
            this_offset = 0
        else:
            # 正常写入body, index 增1
            this_offset = body_offset
            body.write(pixels)
            body_offset += 1

        # 写 header
        this_char_h = bytearray(2)
        this_char_h[0] = 0xFF & (this_offset >> 8)
        this_char_h[1] = 0xFF & this_offset
        header.write(this_char_h)

    print(f"total char of {target}: {body_offset}")
    header_bin = header.getvalue()
    body_bin = body.getvalue()
    with open(f"{target}.ftlib", "wb") as f:
        f.write(header_bin)
        f.write(body_bin)
验证函数:
def get_code(char: str, font_file: str) -> bytearray:
    if len(char) > 1:
        raise ValueError

    header_offset = ord(char) * 2
    with open(font_file, "rb") as f:
        f.seek(header_offset)
        offset_info = f.read(2)
        offset = 0
        offset |= (offset_info[0] << 8)
        offset |= (offset_info[1] << 0)
        inner_offset = 65536*2 + (offset * 20)

        f.seek(inner_offset)
        data = f.read(20)
        return bytearray(data)


def render_and_show(char: str, font_file: str):
    img = Image.new("RGB", (10 * len(char), 10), 0)

    for i in range(len(char)):
        x_offset = i * 10
        data = get_code(char[i], font_file)
        for y in range(10):
            this_line = []
            for x in range(8):
                this_line.append(0 if data[y * 2] & (1 << x) else 0xFFFFFF)
            for i in range(2):
                this_line.append(0 if data[y * 2 + 1] & (1 << i) else 0xFFFFFF)
            for x, color in enumerate(this_line):
                img.putpixel((x + x_offset, y), color)
    img.show()


render_and_show("免费 123 壹贰叁 ①②③ 周杰伦-千里之外 abc ABC 魑魅魍魉 天地玄黄 ?!@#$%^&* ?!@#¥%……&*()", font_file="./zf.ftlib")
实测效果:

