MADL!AR
Code is cheap, show me the PPT!
首页
分类
Fragment
关于
Kubeflow Pipeline简介
分类:
kubeflow
发布于: 2023-02-28
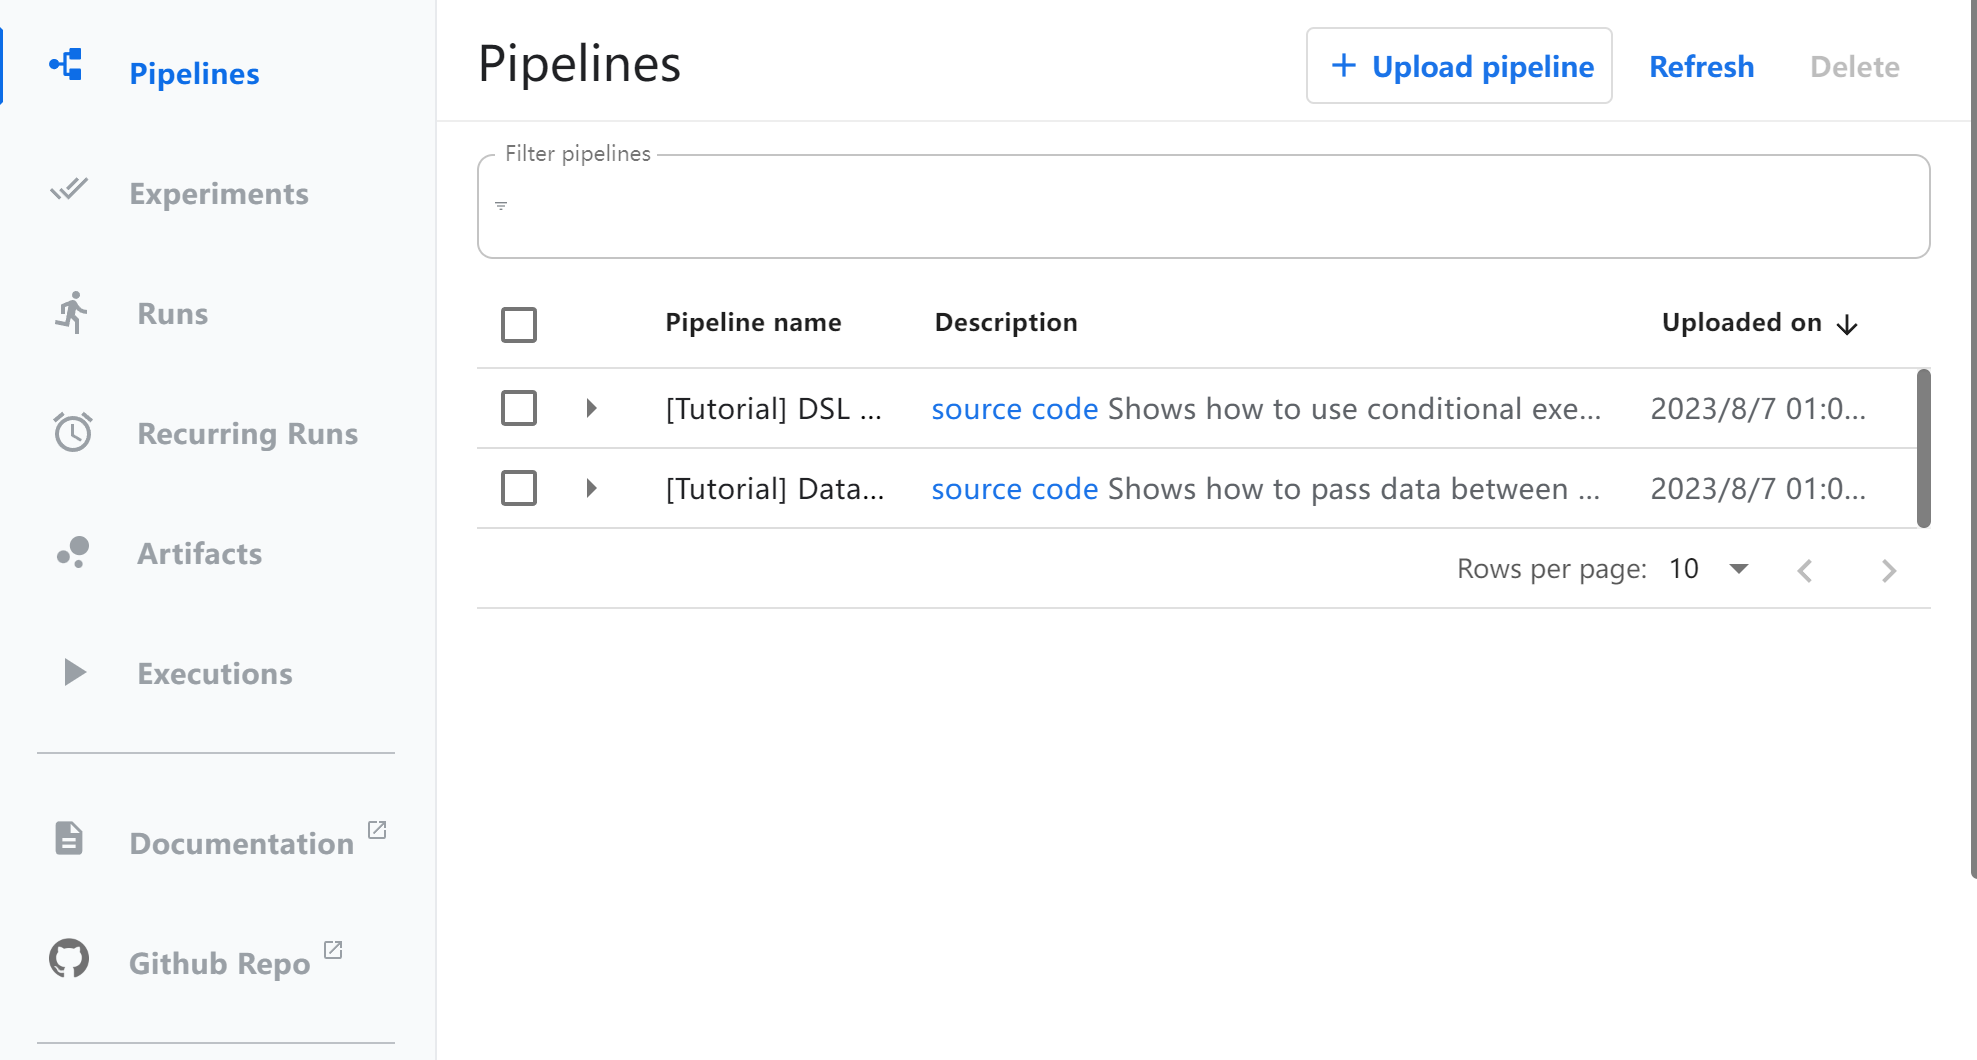
### 目录 * [简介](#brief) * [安装](#install) * [组件](#component) * [pipeline](#pipeline) <br/> <br/> <h2 id="brief">简介</h2> KubelowPipelines(KFP)是一个通过使用Docker容器构建和部署可移植和可扩展机器学习(ML)工作流的平台,KFP可作为Kubelow的核心组件,也可以独立安装。KFL要达成的目标是: * 工作流 end-to-end 的编排 * 组件和 pipeline 可重用、灵活组合 * 易于管理和追踪,对 pipeline的定义、运行、experiments和ML artifacts进行可视化 * 通过缓存消除重复的执行来提升计算资源的利用率 * 通过平台无关的 IR YAML pipeline 定义达成跨平台流水线可移植性 pipeline即流水线,是一种工作流的定义,它将一个或多个组件组合在一起,形成计算有向无环图(DAG)。在运行时,每个组件执行都对应于单个容器执行,这可能会创建ML artifacts。管道也可能具有控制流的功能。 <h2 id="install">安装</h2> 参考链接[https://www.kubeflow.org/docs/components/pipelines/v2/installation/](https://www.kubeflow.org/docs/components/pipelines/v2/installation/) 上述链接会跳转到v1的安装教程。需要注意的是,pipeline的安装分为单用户和多用户,其中多用户的版本只有选择“完整安装kubeflow”时才能提供。 对于实验和学习性质的部署,可以选择使用单独安装的pipeline版本,相关链接:[Standalone Deployment](https://www.kubeflow.org/docs/components/pipelines/v1/installation/standalone-deployment/) 。 官方组件的镜像都由谷歌gcr仓库托管,在国内网络环境限制下,直接部署非常困难。因此可以选择在Google Cloud Platform上使用GKE创建k8s集群,几乎没有阻碍。如果使用国内云服务厂商,也有另一种方式: 1. 创建一台能够连通外网的服务器,单独部署 pipeline 不会耗费太多资源,4c8G就能启动基础组件 2. 安装docker,并使用 [kind](https://github.com/kubernates-sigs/kind) 创建一个集群 3. 执行官网命令: ```shell export PIPELINE_VERSION=2.0.0 kubectl apply -k "github.com/kubeflow/pipelines/manifests/kustomize/cluster-scoped-resources?ref=$PIPELINE_VERSION" kubectl wait --for condition=established --timeout=60s crd/applications.app.k8s.io kubectl apply -k "github.com/kubeflow/pipelines/manifests/kustomize/env/dev?ref=$PIPELINE_VERSION" ``` 按照上述操作完成之后,执行```kubectl get po -n kubeflow```可以看到容器运行状态: ``` root@stand-pipe-control-plane:/# kubectl get po -n kubeflow NAME READY STATUS RESTARTS AGE cache-deployer-deployment-64dc947fc7-cxdl6 1/1 Running 1 (26m ago) 38m cache-server-7f7d6bfb55-2wttc 1/1 Running 1 (26m ago) 38m controller-manager-dfbd6b98-7bfpl 1/1 Running 1 (26m ago) 38m metadata-envoy-deployment-6dcd4ddcb8-mrhsw 1/1 Running 1 (26m ago) 38m metadata-grpc-deployment-5644fb9768-qs82f 1/1 Running 8 (25m ago) 38m metadata-writer-9c4488669-cthrk 1/1 Running 3 (26m ago) 38m minio-55464b6ddb-8kfvt 1/1 Running 1 (26m ago) 38m ml-pipeline-65cc95bd6b-tnf4v 1/1 Running 2 (25m ago) 35m ml-pipeline-persistenceagent-545d5c6786-j6kt6 1/1 Running 3 (26m ago) 38m ml-pipeline-scheduledworkflow-8f9b7654d-772nn 1/1 Running 1 (26m ago) 38m ml-pipeline-ui-7c4cf85598-gp2sn 1/1 Running 1 (26m ago) 38m ml-pipeline-viewer-crd-589c6c6569-bvl9j 1/1 Running 1 (26m ago) 38m ml-pipeline-visualizationserver-9fcfbd447-4ggld 1/1 Running 1 (26m ago) 38m mysql-7d8b8ff4f4-nbcth 1/1 Running 1 (26m ago) 38m proxy-agent-8dc6b5fd8-p987m 1/1 Running 14 (15s ago) 38m workflow-controller-589ff7c479-5lzpd 1/1 Running 2 (26m ago) 38m ``` pipeline附带一个web页面,在后续创建任务、提交pipeline都可以在网页上操作,通过下属命令将请求转发到服务中: ```shell kubectl port-forward -n kubeflow svc/ml-pipeline-ui 8080:80 ``` 其中8080是外部访问的端口。由于上述是借助kind在容器内创建了一个K8S集群,故直接访问```<CLUSTER_IP>:8080```的方式是不能直接访问pipeline-ui的,需要再做一次穿透。可以借助docker-proxy,当然还有另一个简单的方法,通过frp: [https://github.com/fatedier/frp](https://github.com/fatedier/frp) 最终可以访问到此:  要使用KFP,需要了解组件、pipeline、pipeline-ui和pipeline-SDK。其中组件(Component)是基础计算环节的模板,我们通过组件可以定义一个工作流,称为pipeline。当有输入时,通过KFP将各个组件实例化为具体的任务(Task),并由KFP调度执行。 <h2 id="component">组件</h2> 关于组件,请参考这里 [Kubeflow Pipeline之:组件](/notebook/publish/i/caoliang.net/2023-08-04/KubeflowPipeline-zhi--zu-jian.html) <h2 id="pipeline"> pipeline </h2> ### pipeline基础用法 组件有三种编写方法(纯Python组件,容器化Python组件,容器化组件),但流水线只有一种编写方法:使用带有@dsl.pipeline装饰器的流水线函数进行定义。以下是通过勾股定理,在已知直角三角形两条直角边的情况下,计算斜边的示例: ``` from kfp import dsl @dsl.component def square(x: float) -> float: return x ** 2 @dsl.component def add(x: float, y: float) -> float: return x + y @dsl.component def square_root(x: float) -> float: return x ** .5 @dsl.pipeline def pythagorean(a: float, b: float) -> float: a_sq_task = square(x=a) b_sq_task = square(x=b) sum_task = add(x=a_sq_task.output, y=b_sq_task.output) return square_root(x=sum_task.output).output ``` 其定义了3个组件,分别是平方、相加和开方,定义两个浮点数输入a和b,然后定义了4个task,分别对应计算中的4个步骤。 一个流水线拥有5个部分: * pipeline装饰器 * 输入和输出的描述 * 数据流入以及任务的依赖 * 任务的配置(Task configurations) * 流水线的控制流 上述求斜边的示例包含了前4个部分,前3个部分是比较容易理解的,而任务的配置补足了一些特定场景下的需求,比如: ``` from kfp import dsl @dsl.component def print_env_var(): import os print(os.environ.get('MY_ENV_VAR')) @dsl.pipeline() def my_pipeline(): task = print_env_var() task.set_env_variable('MY_ENV_VAR', 'hello') ``` 当流水线执行时,task ```print_env_var```将会打印出预先设置好的'hello'。这里可以视作一种特殊的传参方式。 此外,pipeline也可以视作为一个component,改写上述的求斜边示例: ``` from kfp import dsl @dsl.component def square(x: float) -> float: return x ** 2 @dsl.component def add(x: float, y: float) -> float: return x + y @dsl.component def square_root(x: float) -> float: return x ** .5 @dsl.pipeline def square_and_sum(a: float, b: float) -> float: a_sq_task = square(x=a) b_sq_task = square(x=b) return add(x=a_sq_task.output, y=b_sq_task.output).output @dsl.pipeline def pythagorean(a: float = 1.2, b: float = 1.2) -> float: sq_and_sum_task = square_and_sum(a=a, b=b) return square_root(x=sq_and_sum_task.output).output ``` ### pipeline控制流 尽管使用 @dsl.pipeline 装饰器修饰的 KFP 流水线看起来像是一个普通的 Python 函数,但实际上它是使用 KFP 领域特定语言(DSL)构建的流水线拓扑和控制流语义的表达式。流水线基础部分介绍了通过任务依赖来表达流水线拓扑的数据传递方式。本节描述了如何使用 KFP DSL 在流水线中使用控制流。DSL 提供了三种类型的控制流,每种都由一个 Python 上下文管理器实现:条件、循环和退出处理(Exit handling),通过控制流来实现更加复杂的控制: #### 条件 dsl.Condition上下文管理器依据输入参数,在其作用域内实现任务的条件执行。其受两个参数:一个必需的条件和一个可选的名称。条件是一个比较表达式,其中至少有一个操作数是来自上游任务或管道输入参数: ``` from kfp import dsl @dsl.pipeline def my_pipeline(): coin_flip_task = flip_coin() with dsl.Condition(coin_flip_task.output == 'heads'): conditional_task = my_comp() ``` 在此例程中,```conditional_task```只有在```coin_flip_task```输出'heads'时才会执行。 #### 循环 dsl.ParallelFor上下文管理器允许在静态项目集上并行执行任务。该上下文管理器接受三个参数:一个必需的items,一个可选的parallelism和一个可选的名称。items是要循环遍历的静态项目集,parallelism是在执行dsl.ParallelFor组时允许的最大并发迭代次数。parallelism=0表示无限制的并行性。 下述示例中,模型会分别训练1、5、10、25个轮次,并且不会有超过2个任务同时运行: ``` from kfp import dsl @dsl.pipeline def my_pipeline(): with dsl.ParallelFor( items=[1, 5, 10, 25], parallelism=2 ) as epochs: train_model(epochs=epochs) ``` note:KFP可能并未完全支持 #### 退出处理 dsl.ExitHandler上下文管理器允许给pipeline指定一个退出任务,作用域内的任务执行完成后运行,即使其中一个任务失败也是如此。类似Python的```finally```块。其接受两个参数:一个必需的exit_task和一个可选的名称。exit_task接受一个实例化的PipelineTask: ``` from kfp import dsl @dsl.pipeline def my_pipeline(): clean_up_task = clean_up_resources() with dsl.ExitHandler(exit_task=clean_up_task): dataset_task = create_datasets() train_task = train_and_save_models(dataset=dataset_task.output) ``` 在此实例中,```clean_up_task```会在```create_datasets```和```train_and_save_models```都完成之后再执行, 即使有任务失败也会。需要注意的是,clean_up_task 最先初始化,但它做最后收尾的工作,有些反直觉。 <br/> --- 参考资料: [Run a Pipeline](https://www.kubeflow.org/docs/components/pipelines/v2/run-a-pipeline/) [Command Line Interface](https://www.kubeflow.org/docs/components/pipelines/v2/cli/)